This page displays the Activity Timeline view of the support system. This page provides a chronological log of all actions performed on a service request, helping users understand how an issue has progressed over time. The timeline includes entries created automatically by the system as well as activities added manually by users. The timeline screen is divided into two main sections.
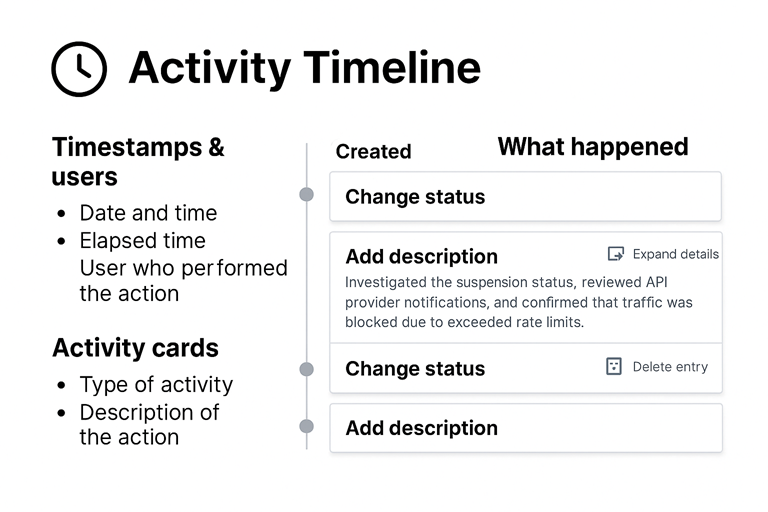
1. Left column — Timestamps and Users
Shows when each activity occurred (date + time).
Displays how much time has elapsed between entries.
Indicates who performed the action (e.g., user, system).
This makes it easy to track delays, follow the workflow, and identify responsible parties.
2. Right column — Activity Cards
Each event is represented by a card that includes:
Activity type
Examples: Created, Change status, Add descriptionDescription of the action
Additional text may appear when the user explains what was done.Action buttons
📄 Expand/open details
🗑️ Delete entry (if the user has permission)
These cards allow users to quickly review progress, understand what changed, and access context.
🧭 Types of Activities Shown
The timeline may include several types of actions:
Created
Indicates the moment the service request was opened.
Change status
Shows updates to a ticket’s workflow state, such as:
Open → In Progress
In Progress → Waiting for Provider
Waiting for Provider → Resolved
Add description
Represents additional notes or updates from the user.
These often include:
investigation results
communication summaries
reproduction steps
status explanations
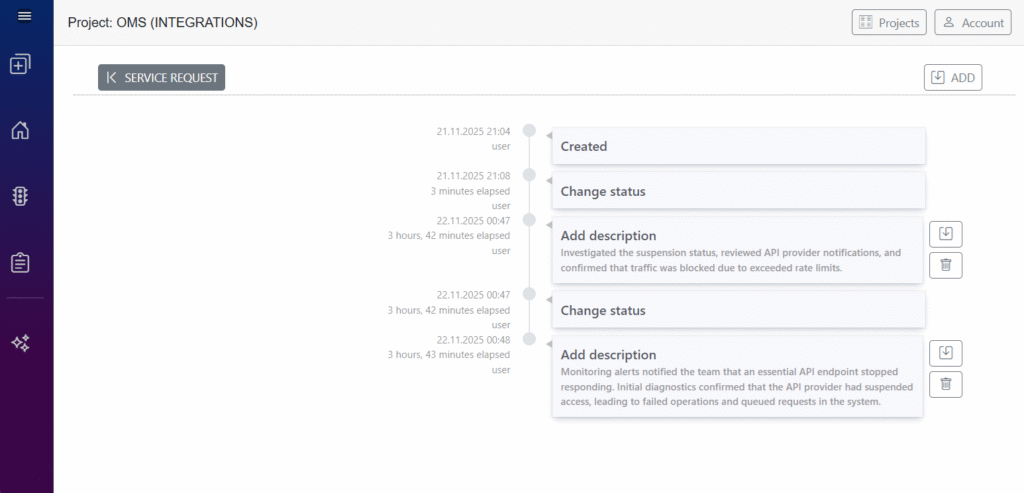
Example from your screenshot:
Investigated the suspension status, reviewed API provider notifications, and confirmed that traffic was blocked due to exceeded rate limits.
System-generated entries
Some actions (e.g., automated status updates) may appear automatically depending on the system configuration.
📝 How Users Should Use This Screen
1. Review progress
Users can follow the timeline to understand how the request has evolved.
It helps answer:
What was done?
When was it done?
Who performed the action?
2. Add new activity
Clicking ADD allows users to record:
status changes
progress updates
notes
decisions
troubleshooting steps
3. Maintain transparency
All important interactions should be logged in the timeline so the entire team has clear visibility.
4. Validate actions
Supervisors or reviewers can verify that:
steps are performed in the correct order
time between steps is reasonable
required documentation is included
⭐ Best Practices for Timeline Entries
Keep descriptions clear and concise.
Document decisions and important findings.
Include timestamps for key events (if not added automatically).
Make sure each entry reflects meaningful progress.
Avoid duplicating information already present in the ticket description—use this space for updates.